
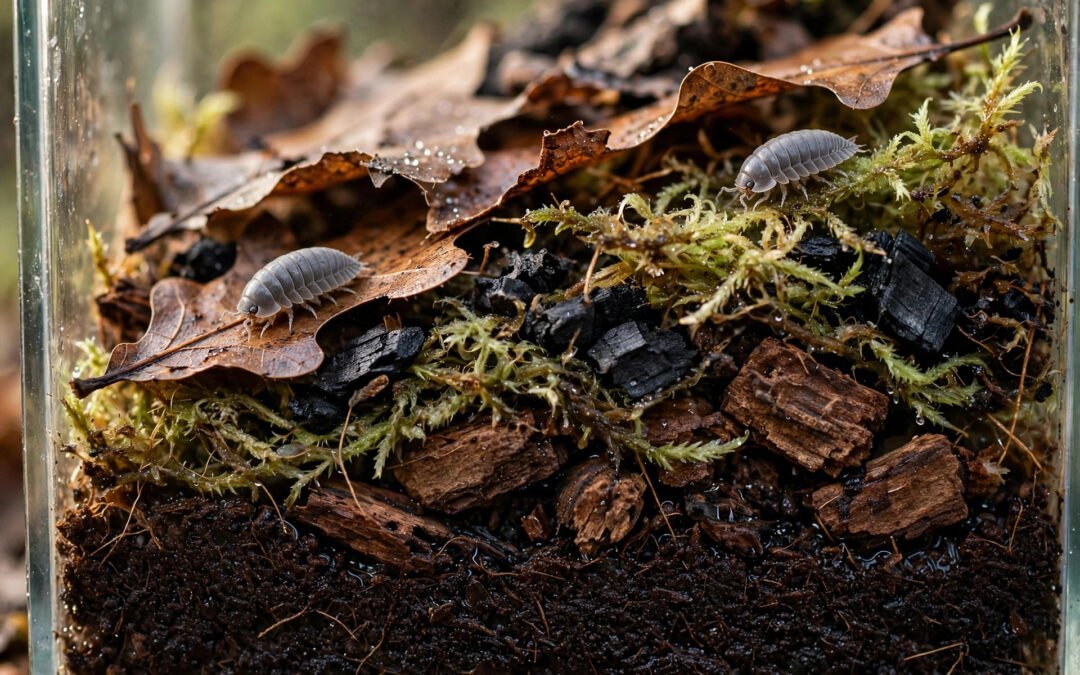
The Classic Recipe: ABG Mix (2-2-1-1-1)
The most widely recommended recipe in the hobby comes from the Atlanta Botanical Gardens, usually called ABG mix. It was designed for tropical terrariums, but it happens to be nearly ideal for isopods too. Measured in parts by volume (use a cup or a scoop — precision doesn’t matter):
- 2 parts fine fir/orchid bark — structure and air pockets
- 2 parts tree fern fiber — moisture retention without sogginess
- 1 part milled or long-fiber sphagnum moss — the main water reservoir
- 1 part horticultural charcoal — filtration, odor control, and antifungal help
- 1 part peat moss or coco coir — fine filler that ties the mix together
Combine everything dry, then add water gradually and mix by hand until it holds together when squeezed but doesn’t drip. That’s it. This mix stays aerated for months, resists going sour, and every component slowly becomes food or habitat as it breaks down.
If tree fern fiber is hard to find where you live, swap it for extra coco coir — the mix won’t be quite as long-lived, but it will still work well.
A Simpler Beginner Mix (4 Ingredients)
ABG ingredients can feel like a scavenger hunt if you’re just starting out. This simplified mix uses only items you’ll find at any reptile or garden shop, and it’s what plenty of keepers actually run long-term:
- 3 parts organic topsoil or coco coir — the base
- 2 parts leaf litter (oak, magnolia, or maple) — food and shelter
- 1 part sphagnum moss — moisture buffer
- 1 part orchid bark or small wood chunks — structure and hiding spots
Mix it damp, layer it 2–4 inches deep, and top it with a generous extra layer of whole leaves. Isopods live half their lives under leaf litter, so don’t be shy with it — a thick leaf layer is the cheapest enrichment you’ll ever buy.
What Each Ingredient Brings to the Table
- Coco coir / peat moss — cheap, moisture-holding base that gives the mix its soil-like body. Always untreated (no added fertilizer). Compacts over time, so it never goes in alone.
- Leaf litter — arguably the most important component. Decaying oak, maple, magnolia, or beech leaves are the backbone of an isopod’s diet. Collect them yourself only from pesticide-free areas, or buy bagged litter from reptile suppliers. Our feeding guide shows how leaf litter fits into a complete diet.
- Sphagnum moss — the moisture battery. A handful holds a surprising amount of water and releases it slowly, smoothing out the drying between mistings. It also resists rotting longer than most organic matter.
- Bark and wood — orchid bark, cork, or pesticide-free hardwood chunks create air pockets and structure. Soft rotting wood (like white-rotted oak) gets eaten outright — a bonus.
- Charcoal — horticultural or activated charcoal (not barbecue). It sweetens the mix, discourages the sour smell of struggling substrate, and seems to slow mold growth.
Ingredients to Avoid
Some things that sound reasonable are genuinely bad ideas:
- Fertilized or “moisture control” potting soil. Added fertilizers, wetting agents, and slow-release nutrients can poison a colony. If a bag lists added fertilizer or pesticides, skip it.
- Pine, cedar, or eucalyptus wood and bark. The aromatic oils are toxic to invertebrates. Stick to hardwoods like oak, maple, and magnolia.
- Dyed or scented mulch. Decorative garden mulches are treated with dyes and sometimes chemicals — none of that belongs in an enclosure.
- Pure sand or gravel. Neither holds moisture nor feeds anything, and sharp grains can damage soft new exoskeletons after a molt.
- Vermiculite from unknown sources. Fine horticultural vermiculite is okay, but it offers no food value and old stock can contain contaminants — coir and moss do its job better anyway.
How Deep Should the Substrate Be?
Depth matters more than most beginners expect. Two to three inches is the minimum for a starter colony in a shoebox-sized tub; four inches or more is better for breeding projects, since it holds a steadier moisture gradient and gives females room to stash babies. If your enclosure is tall enough to allow it, slope the substrate deeper on one end — that gradient is the core of a proper enclosure setup, with a moist end and a drier end the isopods can move between.
Don’t forget the leaf layer on top: it doesn’t count toward the substrate depth, but your isopods will spend most of their time in it. For burrowing species like the Dairy Cow isopod, give 3–4 inches of substrate to dig in. Tropical Rubber Ducky isopods need deep, moisture-holding substrate — see their full Rubber Ducky isopod care guide. Dwarf White isopods live almost entirely inside the substrate, so mix quality matters most for them. Related guides: isopod humidity control guide | beginner isopod care guide | common isopod keeping mistakes
Preparing and Adding Substrate
Mix your substrate in a bucket or bin rather than in the enclosure — it’s much easier to get the moisture even. Add water a little at a time, mixing by hand, until a squeezed handful holds its shape with no water dripping out. That “damp sponge” feel is the target.
If you collected anything from outdoors (leaves, bark, soil), bake it at around 200°F (95°C) for 30–45 minutes to kill hitchhiking mites and other pests, and let it cool fully before use. Substrate is how pest mites usually arrive — our guide to mold and mites in isopod enclosures explains what to watch for.
Spread the mix in, press it down lightly (don’t pack it), scatter the top leaf layer, add hides and a water source, and you’re ready for isopods.
When to Refresh It
A good mix doesn’t get thrown away on a schedule — it gets topped up. Every few weeks, add a fresh handful of leaf litter and a little moss, since the isopods will have eaten the old layer down. Every 6–12 months, depending on colony size, replace about half the substrate with fresh mix.
Never do a full 100% change on an established colony unless something is seriously wrong (like pesticide contamination): the old substrate is full of beneficial microbes and tiny newborn isopods you’d lose with it. A thriving colony often breeds right in the substrate, so always check for babies before scooping any out.
One habit that pays off: when you refresh, smell the substrate. Healthy isopod substrate smells like a forest floor — earthy and clean. A sour or rotten-egg smell means it’s gone anaerobic, and that’s your cue to replace more aggressively and check ventilation and watering.
Best Isopod Substrate
The best isopod substrate for most keepers is the 5-ingredient DIY mix in the recipe on this page — it holds moisture without staying soggy and gives the colony material to graze on as it breaks down. Mix it as written, keep one end of the enclosure damper than the other, and top it up as it decomposes rather than replacing the whole tub at once.
Trackbacks/Pingbacks